



 切换语言
切换语言
切换语言
切换语言
A dental chair is only one part of the operatory. The room around it determines how easily dentists, assistants and patients can move, how equipment is reached, and how the clinic can be maintained over time. Before ordering a new dental unit, it is useful to map the room around real clinical activities rather than placing equipment first and solving workflow problems later.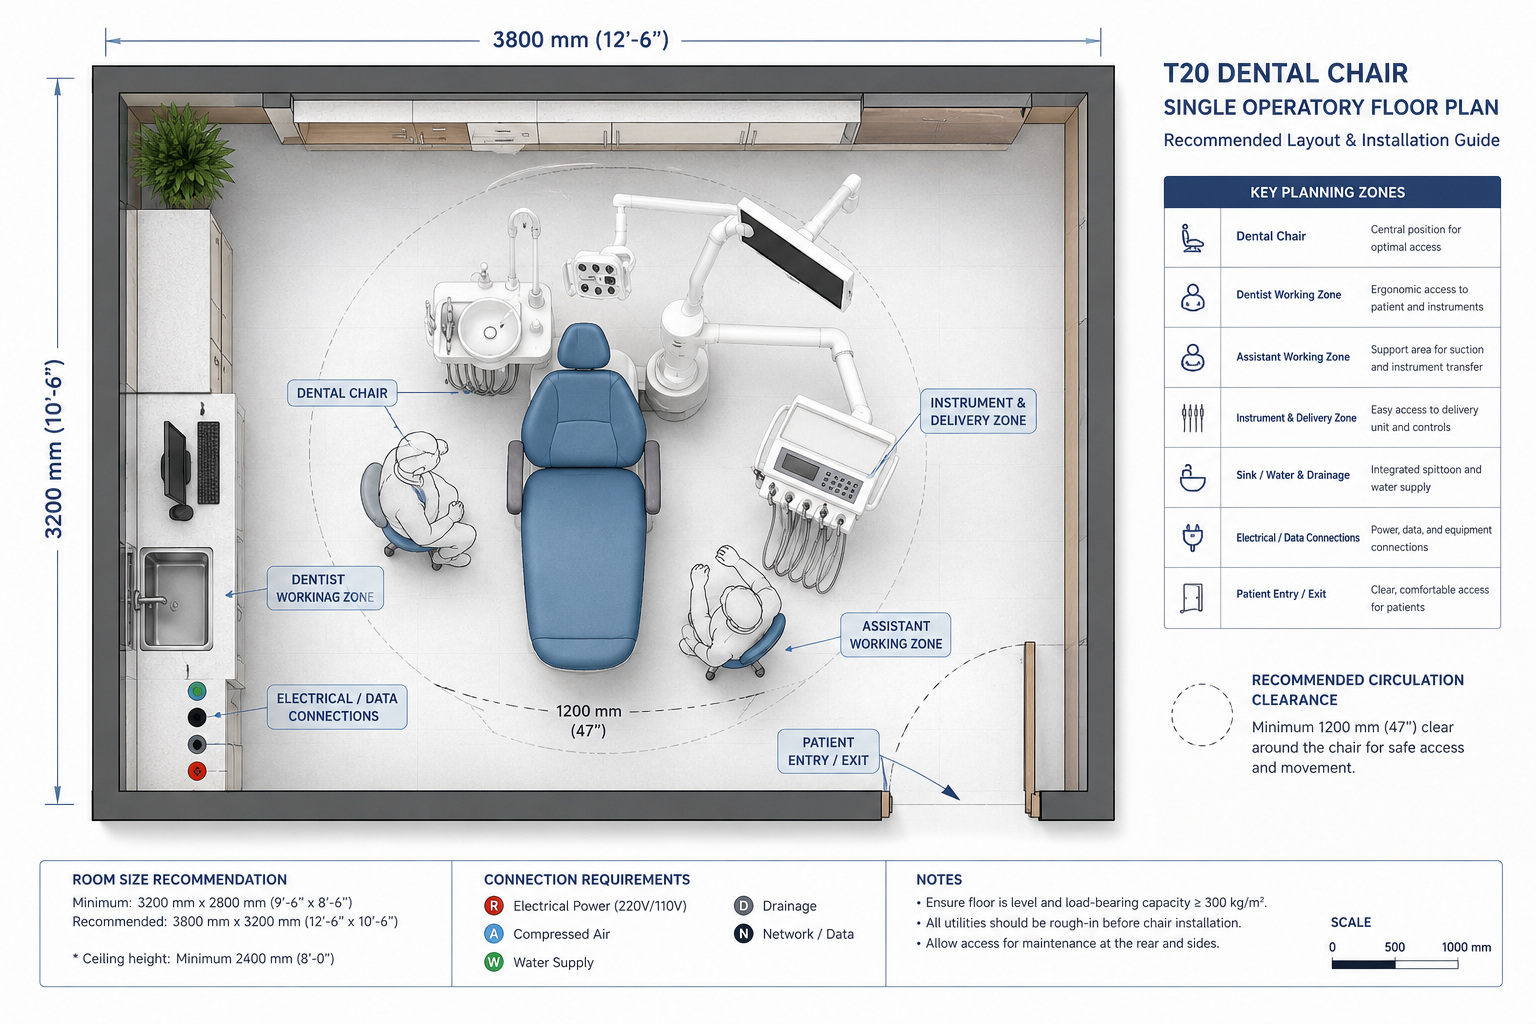 Figure 1. A simple zoning approach for dental operatory planning
Begin by listing the routine steps performed in the room: patient entry, seating, examination, treatment, imaging, documentation and room turnover. Mark where the dentist stands, where the assistant works and where frequently used items are located. This simple map often reveals whether the proposed chair position supports or interrupts the workflow.
The objective is not to make every room identical. A general dental room, specialty treatment room and small clinic may need different layouts. The useful principle is to keep the core treatment path predictable and minimize unnecessary movement.
Measure the clear room dimensions, door width, ceiling height and the location of fixed building services. Also consider the path from delivery entrance to the final operatory. A unit that fits on paper can still be difficult to move through a doorway, corridor or lift.
Leave practical space around the chair and equipment for normal operation, cleaning and servicing. Service access is easy to overlook during design because it is not part of the daily treatment workflow, but it matters later when components need inspection or replacement.
A useful starting point is to define a doctor zone, assistant zone, patient entry and exit zone, and equipment or storage zone. The exact boundaries will vary with the room and equipment configuration. What matters is that people can identify the main working areas at a glance.
When reviewing a proposed dental unit, ask where the controls, instrument tray, suction and light are located relative to the people who use them most. This can be more important than adding features that are rarely used.
A clinic may add imaging equipment, replace a monitor or change storage later. Avoid a layout that works only for today. Provide enough flexibility to adapt the room without moving the entire operatory.
For manufacturers and distributors, it is also useful to document the room assumptions in the project file so that installation teams and customers share the same expectations.
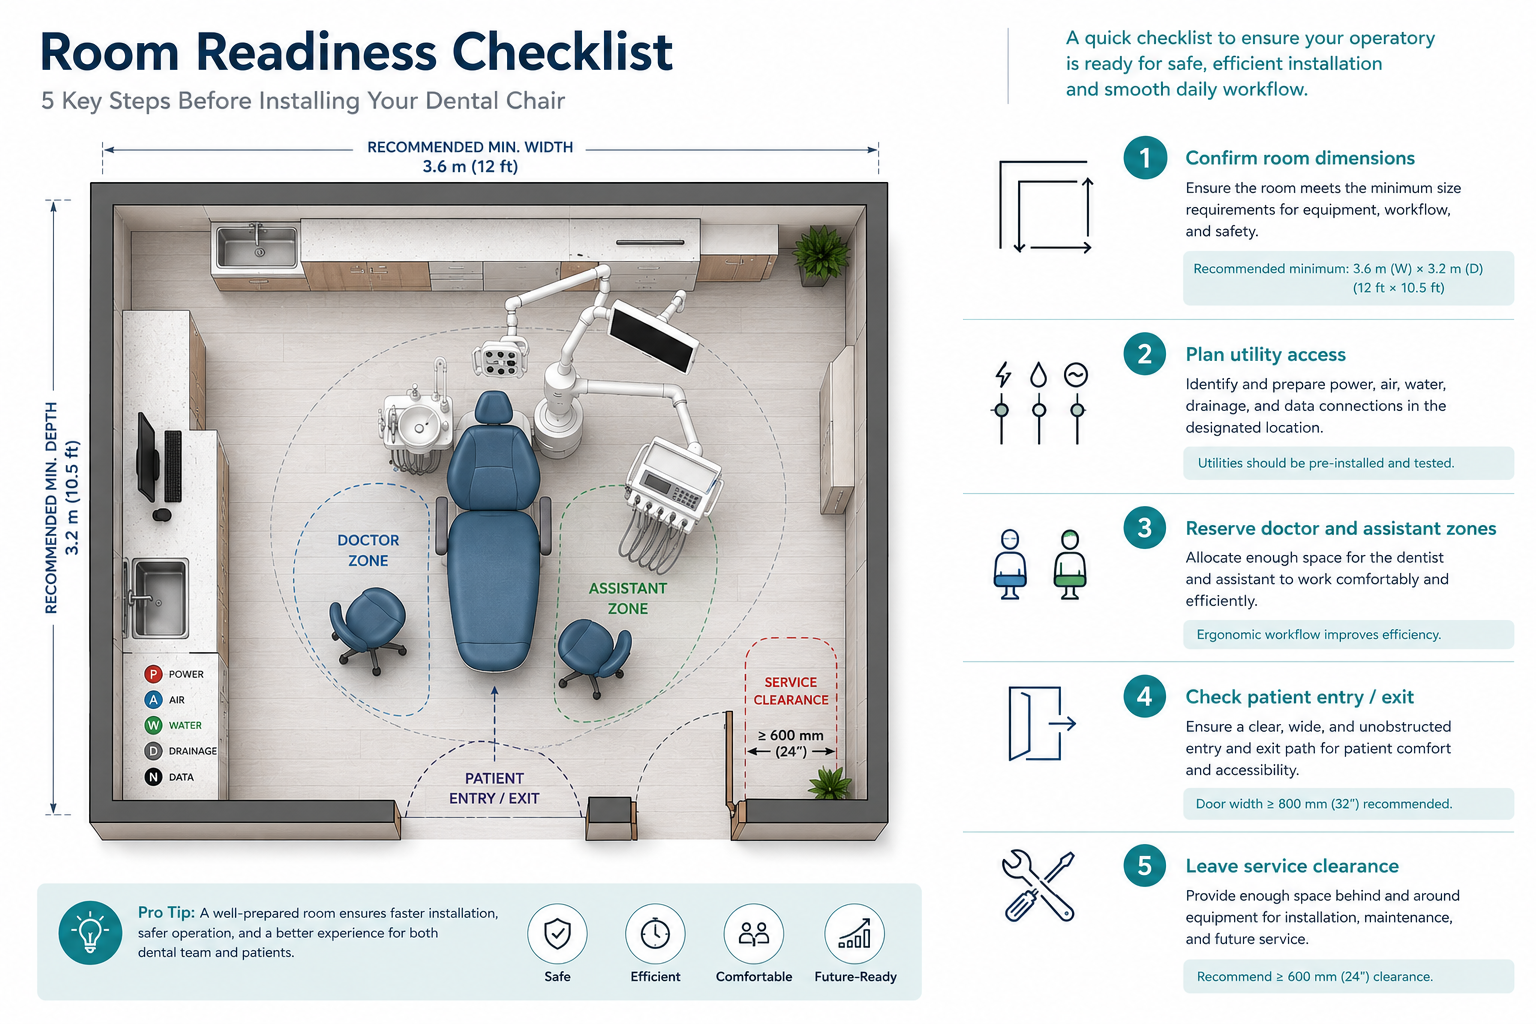
Figure 2. Room-readiness checks before equipment delivery.
· Confirm room and door dimensions.
· Mark doctor, assistant and patient zones.
· Review utility and service access.
· Plan cleaning and maintenance clearance.
· Check equipment delivery route.
The required space depends on the specific chair, equipment configuration, room layout and local installation requirements. Use the manufacturer installation drawing rather than a generic room-size rule.
Yes. Leaving practical access for inspection and maintenance can make future service work easier and reduce disruption.
Start with the treatment workflow and map who needs to reach what during a normal appointment.